About Wookmark jQuery Plugin
The jQuery Wookmark Plug-in provides the necessary properties and methods that would allow you to create the layout effect similar to the layout in Pinterest.com. You will have to first download the zip file from the site and extract it. The zip packs some important files such as, wookmark.js, main.css etc., along with lots of examples.
It is easy to attach the images on your web page with the plug-in and quickly add some already available features to it. However, you must edit all the images first, and give similar width size to the images. The height of the images is not an issue and can vary. If you want, you can add images without editing the width and keep it original.
In the markup section, first add the jQuery CDN or .js file along with Wookmark .js and .css files. I am using the wookmark main.css file in my example, as it will add a default font to the image text along with a nice background color. It has other properties too.
<!DOCTYPE html>
<html>
<head>
    <title>Wookmark jQuery Image Layout Plugin</title>
    <script src="https://ajax.googleapis.com/ajax/libs/jquery/1.10.1/jquery.min.js"></script>

    <!--ADD WOOKMARK LIBRARIES-->
    <script src="Wookmark-jQuery-master/Wookmark-jQuery-master/wookmark.min.js"></script>
    <script src="Wookmark-jQuery-master/Wookmark-jQuery-master/wookmark.js"></script>
    <link rel="stylesheet" href="Wookmark-jQuery-master/Wookmark-jQuery-master/css/main.css">

    <style>
        ul {
            list-style:none;
        }
        li {
            display:list-item;
            border:solid 1px #CCC;
            background:#FFF;
            cursor:pointer;
        }
        li > div {
            text-align:center;
            padding:2px 1px;
            margin:2px;
            color:#555;
            font-size:13px;
        }
    </style>
 </head>
 <body>
    <div style="width:750px;">
        <ul id="myImages">
            <li>
                <img src="sample/ASCENSION.jpg" width="230" height="200" alt="" />
                <div>12 x 14 ~ "ascension"</div>
            </li>
            <li>
                <img src="sample/CAR.png" width="230" height="134" alt="" />
                <div>Image ~ “my car”</div>
            </li>
            <li>
                <img src="sample/BALANCE.jpg" width="230" height="200" alt="" />
                <div>Image ~ “balance”</div>
            </li>
            <li>
                <img src="sample/OCEAN.jpg" width="230" height="180" alt="" />
                <div>Image ~ “landscape”</div>
            </li>
            <li>
                <img src="sample/TAJMAHAL.jpg" width="230" height="200" alt="" />
                <div>Image ~ “the tajmahal”</div>
            </li>
            <li>
                <img src="sample/MOTORSPORT.jpg" width="230" height="200" alt="" />
                <div>Image ~ “motor sport”</div>
            </li>
            <li>
                <img src="sample/LAKE.jpg" width="230" height="200" alt="" />
                <div>Image ~ “lake”</div>
            </li>
        </ul>
    </div>
</body>
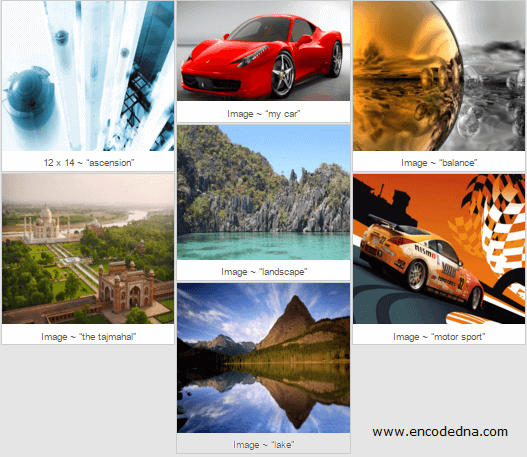
I have added few images to my web page. The unordered list or the <ul> serves as a container and has all the images in it, along with a text describing each image. I have given it an id called myImages. You need to hook the container (with its id) to the plug-in when the page loads.
<script>
    $(document).ready(function () {
        var ul = new Wookmark('#myImages', {
            outerOffset: 5,         // DEFAULT IS '0'.
            offset: 2,
            itemWidth: 232,         // VALUE CAN BE IN "%". FOR EX: 10%.
            align: 'left'
        });
    });
</script>
</html>
Once you have hooked the image container (myImages) to the jQuery plug-in, it will automatically create a uniform layout. I have added few options to the method.
1) outerOffset – The distance to the containers border. It will separate the image container (the <ul>) with other elements on the page.
2) offset – It’s the margin or the space between each image inside the container.
3) itemWidth – The width of the grid item in the container. Its takes a number value or you can assign value in percentage (%).
4) align – You can align the images on the page left or right.
All the above-mentioned options are optional. You can omit or keep the options according to your choice.
