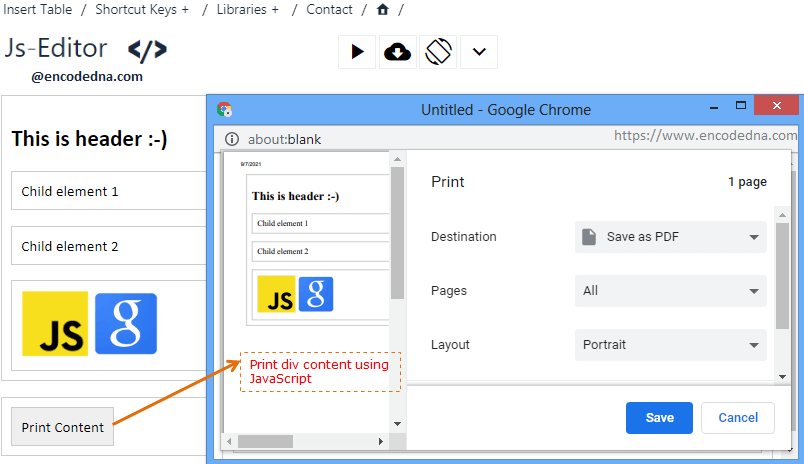
An HTML <div> element can have different types of content inside different elements, like a <p> element, a header element (<h2>), it can have an <img /> (or image) element etc.
image

To print the contents of various elements inside a <div>, we’ll have to first extract the contents and store it in a variable. Then we’ll open a window (a pop window) and write the contents (stored in a variable) in the window and print.
Let’s see an example.
1) Print contents of <div> element 🚀
In the first example, the <div> will have two <p> elements and an <h2> (for header) element.
<!DOCTYPE html>
<html>
<body>
    <div id='parent'>
        <h2>This is header :-)</h2>

        <p>
            Child element 1
        </p>
        <p>
            Child element 2
        </p>
    </div>

    <p>
        <input type='button' value='Print Content' onclick='myApp.printDiv()' />
    </p>
</body>
<script>
    var myApp = new function () {
        this.printDiv = function () {
            // Store DIV contents in the variable.
            var div = document.getElementById('parent');

            // Create a window object.
            var win = window.open('', '', 'height=700,width=700'); // Open the window. Its a popup window.
            win.document.write(div.outerHTML);     // Write contents in the new window.
            win.document.close();
            win.print();       // Finally, print the contents.
        }
    }
</script>
</html>The parent <div> element has an id. Using the element’s id, I am first extracting the contents of it and storing it in a variable. See the above script.
The window object is important here. It represents a window in browser. I am using the object to open a new browser window.
window.open()
The method takes 4 parameters like url, name, features and replace. However, I have just assigned "height and width' of the window. If you remove the first two blank parameters, the method will open a new window in new a tab.
The .write() method (win.document.write(div.outerHTML);) will write the contents in the new popup window, which is later closed using the .close() method.
After closing the window object, I am printing the contents using the .print() method.
win.print();
Note: If a printer is attached to the computer, it will ask you to choose a printer. Or else, it will print a PDF document.
2) Print <div> Content with Images 🚀
Now, lets print the contents of a <div> element along with images.
<!DOCTYPE html>
<html>
<head>
    <style>
        div {
            border: solid 1px #CCC;
            padding: 10px;
        }

        img { width: 75px; height: 75px; }
        input { font-size: 20px; }
    </style>
</head>
<body>
    <div id='parent'>
        <h2>This is header :-)</h2>

        <p>
            Child element 1
        </p>
        <p>
            Child element 2
        </p>

        <!--Here are the images-->
        <div>
            <img src='https://www.encodedna.com/images/theme/javascript.png' alt='JS' />
            <img src='https://www.encodedna.com/images/theme/google.png' alt='Google' />
        </div>
    </div>

    <p>
        <input type='button' value='Print Content' onclick='myApp.printDiv()' />
    </p>
</body>
<script>
   var myApp = new function () {
        this.printDiv = function () {
            // Store DIV contents in the variable.
            var div = document.getElementById('parent');

            // Create a window object.
            var win = window.open('', '', 'height=700,width=700'); // Open the window. Its a popup window.
            win.document.write(div.outerHTML);     // Write contents in the new window.
            win.document.close();
            win.print();       // Finally, print the contents.
        }
    }
</script>
</html>There is not much difference between the first and second example. The script is the same for both the examples, with or without images. There’s not much to explain.
I have "defined CSS style" with in the <head> tag in the above example (the 2nd example) for the elements, especially for the images (img { width: 75px; height: 75px; } ). Each image have specific width and height defined. See the <style> tag inside the <head> tag. But, not style is applied to the element while printing.
However, we can apply style to the images and other elements before printing it.
Add some Style to the Print
To define style to the print, add a variable and add few styles (CSS styles) according to you requirement. For example,
<script>
    var myApp = new function () {
        this.printDiv = function () {
            var div = document.getElementById('parent');
            var win = window.open('', '', 'height=700,width=700');

            // Define and style for the elements and store it in a vairable.
            var style = '<style>';
            style = style + 'div, p {border: solid 1px #CCC;' +
            	'padding: 10px;}';
            style = style + 'img { width: 75px; height: 75px;}';
            style = style + '</style>';

            // Now, write the DIV contents with CSS styles and print it.
            win.document.write(style);
            win.document.write(div.outerHTML);
            win.print();
        }
    }
</script>Now, the <div> element has borders and padding. The image has specific width and height. Similarly, if you want you can define fonts, size, colours etc.
