Let us assume, I have few HTML elements on my web page and one of it has a class defined named C1. I am using both display and visibility property of the style object, in this blog post, to hide the element using its class name.
1) Using “display” property
<body>
    <div>
        <p class="c1">
            content inside para1
        </p>

        <p>
            content inside para2
        </p>
    </div>

    <p>
        <input type='button' value='Click to hide' onclick='hideEle()'>
    </p>
</body>
<script>
    let hideEle = () => {
        const ele = document.getElementsByClassName('c1');
        ele[0].style.display = 'none';
    }
</script>In the above example, I am using getElementsByClassName() method to get the class name of the element. Next, I've assigned the display property value to none.
Note: To again show the element, set style.display = 'block';
👉 You can learn more about getElementsByClassName() method here.
2) Using “visibility” property
<body>
    <style>
      .c1 {
        color: red;
      }
    </style>

    <div>
        <p class="c1">
            content inside para1
        </p>

        <p>
            content inside para2
        </p>
    </div>

    <p>
        <input type='button' value='Click to hide' onclick='hideEle()'>
    </p>
</body>
<script>
    let hideEle = () => {
        const ele = document.getElementsByClassName('c1');     // get the class name.
        ele[0].style.visibility = 'hidden';    // now, hide the element.
    }
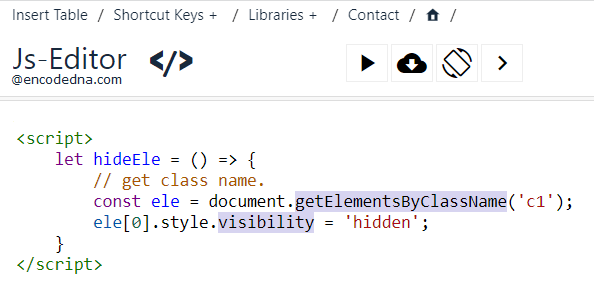
</script>Both the methods (see examples 1 and 2 above) will hide the element having the CSS class c1. But did you notice any difference between the two properties display and visibility? Well, click the Try it buttons after the above examples to see how it worked.
The ele[0].style.display = 'none'; will hide the entire element. Whereas, ele[0].style.visibility = 'hidden'; makes the contents (only) of the element invisible.
Now, lets Toggle (hide and show) the Element with the Class Name
This is optional, but useful.
Using the methods that I have explained above, I’ll now show you how to toggle the show/hide properties of the element with a class name dynamically. Here I am using the ternary operator to toggle.
<body>
    <div>
        <p class="c1">
            content inside para1
        </p>

        <p>
        content inside para2
        </p>
    </div>

    <p>
        <input type='button' value='Click to toggle' onclick='toggle()'>
    </p>
</body>
<script>
    let toggle = () => {
        const ele = document.getElementsByClassName('c1'); // get the class name.
        // toggle or show/hide element.
        ele[0].style.visibility = ele[0].style.visibility == '' ? 'hidden' : '';
    }
</script>Similarly, use the display property to toggle show/hide property.
<script>
    let toggle = () => {
        const ele = document.getElementsByClassName('c1');  // get the class name.
        // toggle or show/hide element.
        ele[0].style.display = ele[0].style.display == 'none' ? 'block' : 'none';
    }
</script>
Hide Multiple Elements inside a Parent Element using Class Name
Now, here’s another scenario, but a different scenario. I have many different elements inside a container element, like and an HTML <div> element and I want to hide multiple elements (specific elements) inside it.
The elements that I want to hide do not have a class. However, the container has a Class Name. Let’s see how it works.
<body>

    <style>
      .c1 {
        padding: 10px 0;
        margin: 10px 0;
      }
    </style>

    <div class="c1">
        <p>
            content inside para1
        </p>

        <p>
            content inside para2
        </p>

        <span>
            content inside SPAN
        </span>
    </div>

    <p>
        <input type='button' value='Click to hide' onclick='hideEle()'>
    </p>
</body>
<script>
    let hideEle = () => {
        const ele = document.getElementsByClassName('c1');


        for (let n in ele[0].childNodes)
        {
            if (ele[0].childNodes[n].nodeName === 'P')
                ele[0].childNodes[n].style.visibility = 'hidden';
        }
    }
</script>
</html>I am extracting every element inside the parent <div> element. The parent element only has a class name. Next, I am checking for <p> elements only and setting the elements visibilily as hidden.
You can use the display property to do the same.
