Last update: 21st August 2023
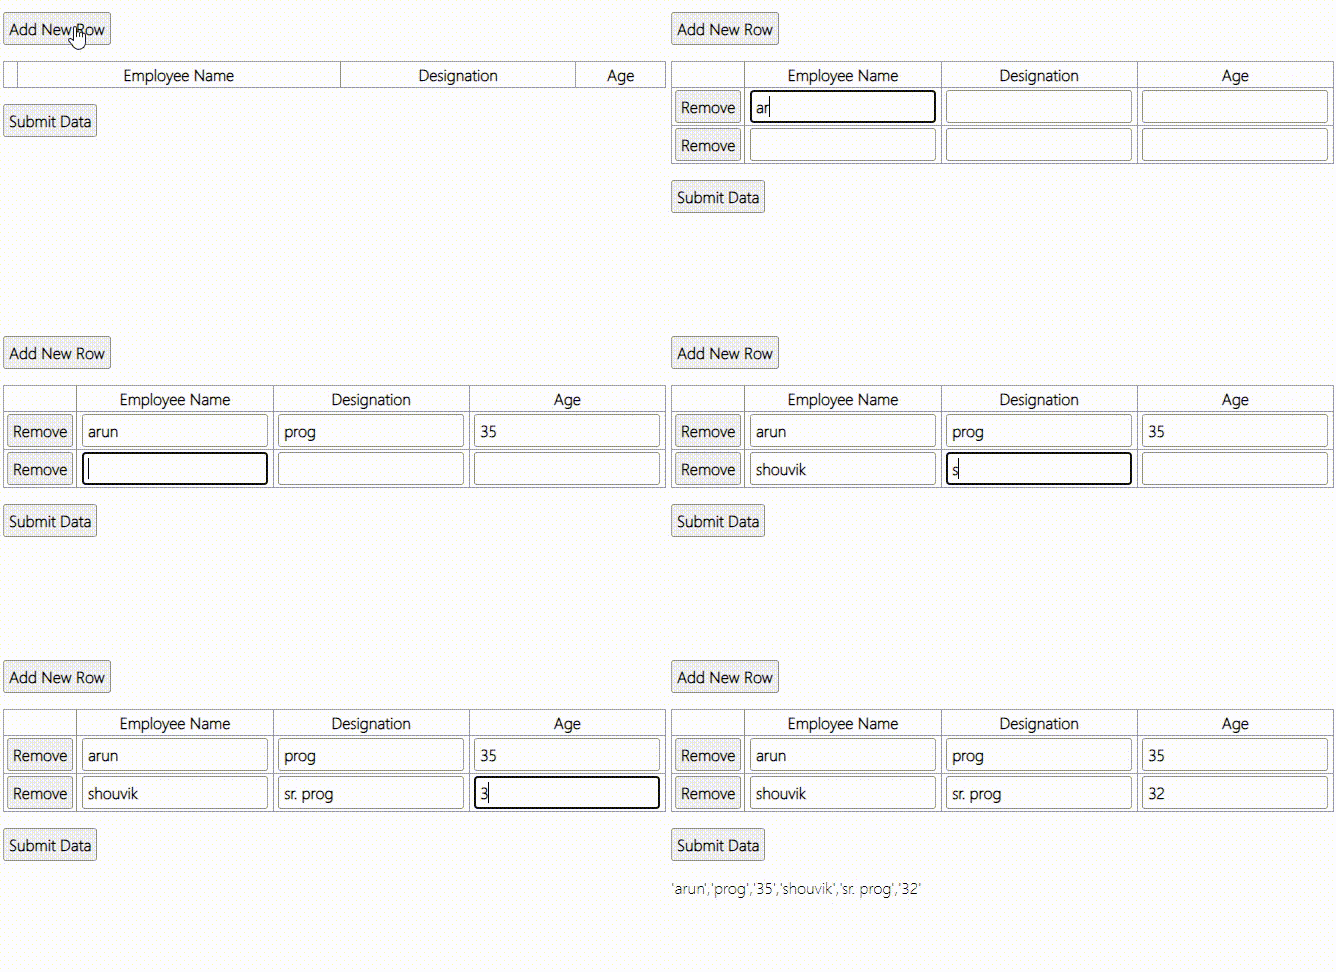
Recently, I shared an article about dynamically adding or removing rows in an HTML table using AngularJS. If you're passionate about JavaScript, this article is tailor-made for you. Here, I'll demonstrate how to add or remove table rows using plain JavaScript.
1) How do you create an entire HTML table dynamically in JavaScript? This post will help beginners to understand the basics of creating dynamic elements in JavaScript. It also explains about JavaScript createElement() method.
2) How to reead data from an HTML table using JavaScript. This quick tip explains how you can easily read data from a table, column wise or the entire table, using a simple script.
In the markup section, there are two buttons and a <div> element (as container). I’ll use the first button to add new rows to the table. However, first I need a table. I’ll create the <table> dynamically when the page first loads and add the table to the <div> element.
<!DOCTYPE html>
<html>
<head>
    <style>
        table { width: 100%; }
        table, th, td {
            border: solid 1px #DDD;
            border-collapse: collapse;
            padding: 2px 3px;
            text-align: center;
        }
    </style>
</head>
<body onload="createTable()">
    <p>
        <input type="button" id="addRow" value="Add New Row" onclick="addRow()" />
    </p>
    <div id="cont"></div>   <!--the container to add the table.-->
    <p><input type="button" id="bt" value="Submit Data" onclick="submit()" /></p>

    <p id='output'></p>
</body>
To remove rows in the table, I’ll add dynamically created buttons (using JavaScript) in each row of the table.
For data entry, I’ll create and add textboxes in each cell, dynamically.
The second button will submit the data in the table.
<script>
    let arrHead = new Array();
    arrHead = ['', 'Employee Name', 'Designation', 'Age'];      // table headers.

    // first create a TABLE structure by adding few headers.
    let createTable = () => {
        let empTable = document.createElement('table');
        empTable.setAttribute('id', 'empTable');  // table id.

        let tr = empTable.insertRow(-1);

        arrHead.forEach(header => {
          // Create a new 'th' element for the table header.
          let th = document.createElement('th');

          // Set the innerHTML of the header element to the current array item.
          th.innerHTML = header;
          tr.appendChild(th);   // Append the header element to the row.
        });

        let div = document.getElementById('cont');
        div.appendChild(empTable);    // add table to a container.
    }

    // function to add new row.
    let addRow = () => {
        let empTab = document.getElementById('empTable');

        let rowCnt = empTab.rows.length;    // get the number of rows.
        let tr = empTab.insertRow(rowCnt); // table row.
        tr = empTab.insertRow(rowCnt);

        // Iterate through each item in the arrHead array using forEach.
        arrHead.forEach((header, index) => {
          // Create a new 'td' element for the table cell.
          let td = document.createElement('td');
          td = tr.insertCell(index);

          if (index === 0) { // The first column.
            // Add a button in every new row in the first column.
            const button = document.createElement('input');

            // Set input attributes.
            button.setAttribute('type', 'button');
            button.setAttribute('value', 'Remove');

            // Add button's 'onclick' event.
            button.setAttribute('onclick', 'removeRow(this)');

            td.appendChild(button);
          } else {
            // 2nd, 3rd and 4th columns will have textboxes.
            const ele = document.createElement('input');
            ele.setAttribute('type', 'text');
            ele.setAttribute('value', '');

            td.appendChild(ele);
          }
        });
    }

    // function to delete a row.
    let removeRow = (oButton) => {
        let empTab = document.getElementById('empTable');
        empTab.deleteRow(oButton.parentNode.parentNode.rowIndex); // buttton -> td -> tr
    }

    // function to extract and submit table data.
    let submit = () => {
        let myTab = document.getElementById('empTable');
        let arrValues = new Array();

        // loop through each row of the table.
        for (let row of myTab.rows) {
          for (let cell of row.cells) {
            if (cell.childNodes[0] != undefined)
            {
              if (cell.childNodes[0].nodeName == 'INPUT' &&
                  cell.childNodes[0].type == 'text') {

                if (cell.childNodes[0].value != '')
            	    arrValues.push("'" + cell.childNodes[0].value + "'");
              }
            }
          }
        }

        // The final output.
        document.getElementById('output').innerHTML = arrValues;
    }
</script>
</html>1) The first method "createTable()" in the script, creates the table. For table headers (column names), I am using an array. You can simply add or remove names in the array for the columns.
For the headers, you can use a JSON array by extracting data from an external JSON file.
1) The second method is addRow(). Here, I am creating and adding rows to the table. The first button on my web page, calls this method. Every click, adds a new row.
The method not only creates rows for the table, it also creates a button (to delete row) and textboxes in each cell or the row. The table is meant for simple data entry. A slight modification in the code and you can use the table for viewing also.
The first column will have a button for each newly created row. The remaining columns will have textboxes. See how I am using the createElement() method to create new elements dynamically and the setAttribute() method to add attributes to the elements.
3) The third method is removeRow(). The method takes a parameter as element (button in this case).
function removeRow(oButton) { }
It removes (or deletes) the entire row. Please see the second method "addRow()" again. Here, I am creating a button and appending it to the first column of each row. While setting the attributes to the button, I have assigned an "onclick" event along with the method [removeRow()] that it would call. I have also assigned a value (this) as parameter.
button.setAttribute('onclick', 'removeRow(this)');
The value this refers the element (the button). It will help identify the row in which the Remove button is located.
empTab.deleteRow(oButton.parentNode.parentNode.rowIndex); // BUTTON -> TD -> TR.The fourth method in the script is submit(). Here, I am extracting values from each textbox in the table and pushing the values in an array. I can now use the array to pass data to my database, calling either a Web Method or a Web API in Asp.Net.
The console.log(values), shows how the array stores the data.

Finally, you can save the data in a database using a Web Method in Asp.Net.
