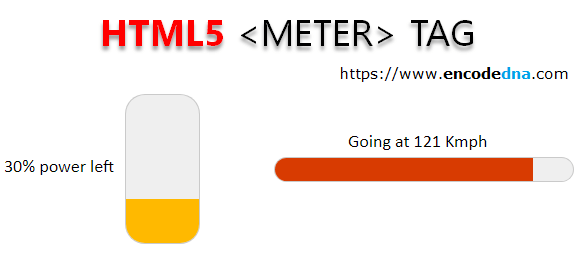
Meter Syntax
<meter></meter>
Meter Element Explained
The <meter> element must have both the start and end tags. So, when you are defining it in your web page,
<meter>
    … some value here
</meter>
<meter> Attributes
The meter element has few attributes.
<meter id='temperature-meter' min='0' max='100' low='20' high='60' optimum='50' value='20'></meter>
• id – every element should have a unique id. So, this is common.
• min – indicates lower numeric bound in a given range. It should be less than the max value.
• max – indicates a higher numeric bound in a given range. It should be greater than the min value.
• low – it represents the upper numeric bound of the low end. It should be greater than the min value.
• high – it presents the lower numeric bound of the high end. This should be less than the max value.
• optimum – indicates the optimum value and should be within the range between min and max values.
This is how you should use the <meter> element in your web page.
<!DOCTYPE html>
<html>
<head>
  <style>
    meter {
      width: 300px;
      height: 50px;
    }
  </style>
</head>
<body>
  <p>
    <meter id='speed-meter'
        min='0' max='140' low='20' high='80' optimum='50'
        value='90'>

      Going at 90 Kmph
    </meter>
  </p>
</body>
</html>See how it defines and changes the colour. Change the numeric value to see different colours.
Change <meter> value using JavaScript
Now let’s see how we can change the meter value dynamically using JavaScript. You can hook the meter with an input box (type text).
<!DOCTYPE html>
<html>
<head>
  <style>
    meter {
      width: 300px;
      height: 50px;
    }
  </style>
</head>
<body>
  <p>
    <label for='speed'>Enter the speed: (like 10, 90, 130) </label>
    <input id='speed' type='text' />
  </p>

  <p>
    <meter id='speed-o-meter'
        min='0' low='71' high='120' max='140'
        value='121'>

      going at 121 Kmph
    </meter>
  </p>
</body>
<script>
  let speed = document.getElementById('speed');

    speed.addEventListener ('input', function () {
        document.getElementById('speed-o-meter').value = this.value;
    });
</script>
</html>Enter values like 10, 90 or 130 in the textbox and see the meter reading. You can extract data from an array or a JSON file to manipulate the <meter> value.
Display <meter> vertically using CSS
By default, the meter is displayed horizontally on a browser. However, you can display the meter element vertically using a little CSS.
There is a method to tilt an element using CSS. So, I gonna apply that method to the <meter> element. Check this out.
<!DOCTYPE html>
<html>
<head>
  <style>
    meter {
      width: 150px;
      height: 150px;

/*   tilt the meter gauge */
      transform: rotate(-90deg);
      -ms-transform: rotate(-90*0deg);	 /*  for IE  */
    }
  </style>
</head>
<body>
  <p>
    <label for='battery'>Enter the value: </label>
    <input id='battery' type='text' />
  </p>

  <p>
    <meter id='battery-power' min='0' low='20' high='50' max='100' optimum='60'value='30'>
      30% left
    </meter>
  </p>
</body>
<script>
  let speed = document.getElementById('battery');

  speed.addEventListener ('input', function () {
    document.getElementById('battery-power').value = this.value;
  });
</script>
</html>Simple isnt it. However remember, do not use the <meter> element to show progress of a process. Instead, use the <progress> element.
