Before you start writing the macro, make sure you have access to Ms-Outlook. You must create an account first.
Open Excel and save the file in ".xlsx" format. This will allow you write the 'macros'.
Next, press Alt+F11 keys to open VBA editor. Alternatively, from the the top menu, select "Developer" menu and click "Macros". Create a Module to write the macro.
Get access to Ms-Outlook in Excel using VBA
To get access to Ms-Outlook objects and properties, you'll have to add a reference of Outlook in your VBA project.
👉 Follow these steps to add a reference of the Outlook object in your VBA project
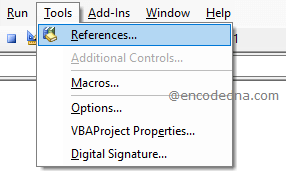
In the top menu find Tools and choose References….

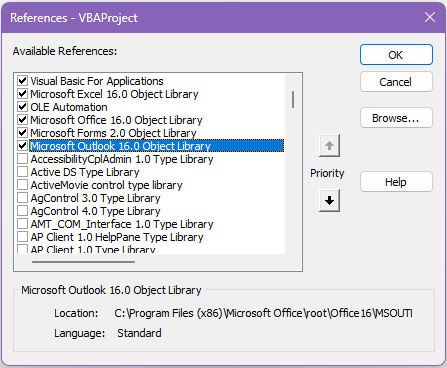
In the References dialog box, find Microsoft Outlook 16.0 Object Library", click the Check-box and press OK.
Note: If you are using Office 2007, add Microsoft Outlook 12.0 Object library.

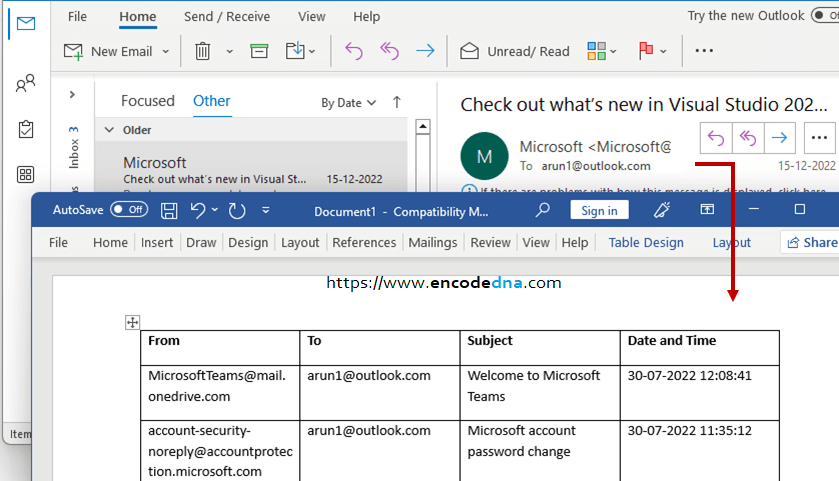
Import Outlook emails into Word doc
Option Explicit Public Sub parseOutlook()� On Error GoTo ErrHandler ' Set Outlook application object. Dim oOutlook As Object Set oOutlook = CreateObject("Outlook.Application") ' Create and set a NameSpace object. Dim oNSpace As Object Set oNSpace = oOutlook.GetNamespace("MAPI") Dim outlookFolder As Object Set outlookFolder = oNSpace.GetDefaultFolder(olFolderInbox) ' ***** WORD object. Dim oWord As Object Set oWord = CreateObject(Class:="Word.Application") oWord.Visible = True oWord.Activate Dim oDoc Set oDoc = oWord.Documents.Add ' Create a range for the Table inside Word doc. Dim oRange Set oRange = oDoc.Range ' Table structure using Rows and Columns. (showing all the rows and just four columns.) oDoc.Tables.Add oRange, outlookFolder.Items.Count, 4 ' Create a Table object. Dim oTable Set oTable = oDoc.Tables(1) oTable.Borders.Enable = True YES, table will have borders. Dim oItem As Object Dim iRows As Integer iRows = 2 The table headers. With oTable .cell(1, 1).Range.Text = "From": .cell(1, 1).Range.Font.Bold = True .cell(1, 2).Range.Text = "To": .cell(1, 2).Range.Font.Bold = True .cell(1, 3).Range.Text = "Subject": .cell(1, 3).Range.Font.Bold = True .cell(1, 4).Range.Text = "Date and Time": .cell(1, 4).Range.Font.Bold = True End With ' Finally, loop through each item in the folder and show result in word document. For Each oItem In outlookFolder.Items Dim oMail As Outlook.MailItem Set oMail = oItem oTable.cell(iRows, 1).Range.Text = oMail.SenderEmailAddress oTable.cell(iRows, 2).Range.Text = oMail.To oTable.cell(iRows, 3).Range.Text = oMail.Subject oTable.cell(iRows, 4).Range.Text = oMail.ReceivedTime 'oTable.cell(iRows, 4).Range.Text = oMail.Body iRows = iRows + 1 Next Set oMail = Nothing ' free memory. Set oOutlook = Nothing Set oNSpace = Nothing Set outlookFolder = Nothing ErrHandler: Debug.Print Err.Description End Sub
Let me explain the code.
First, I am creating an Outlook object using CreateObject() method, followed by a NameSpace object. With the NameSpace object, I'll have access to Outlook folders, like "inbox" etc. In the above macro, I'll access the "Inbox" folder.
Set outlookFolder = oNSpace.GetDefaultFolder(olFolderInbox)

Next, I have created a Word object along with a Table object. Since I am importing the emails in Tabular format.
CreateObject(Class:="Word.Application")
👉 If you want to learn more about creating (new), opening (new or existing) and manipulting Word documents from Excel, then you should check this post.
Finally, we loop through each "item" in the Outlook Inbox folder, extract few email details like "From", "To", "Subject" etc. and write in a Table in our newly created Word document.
