Convert worksheet data to Table without Macro
First, let us see how to convert data into a table using Excel built-it methods. If you are looking for a VBA solution, check this out.
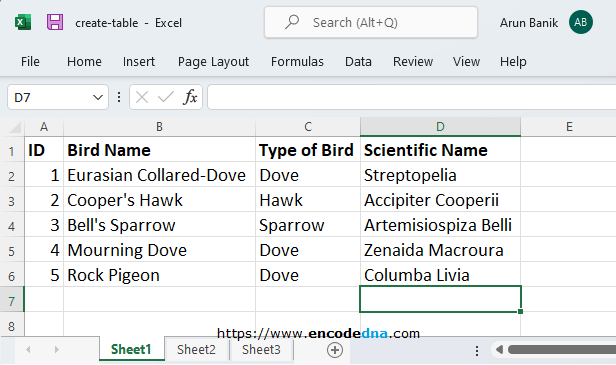
Now, let us assume I have some data in rows and columns. The first row has headers. See the image.
image

1st Method
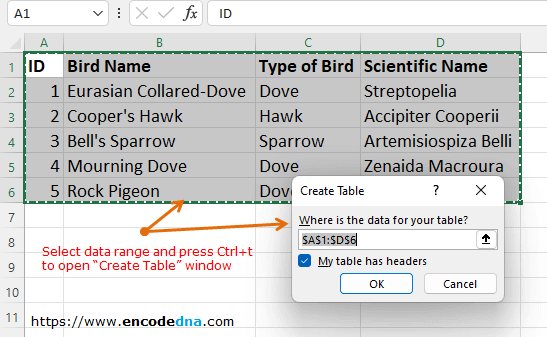
To convert your worksheet data into a table, first select the data range using the mouse or just hold the Shift key and use the arrow keys to select the data.
Press Ctrl+t and it will open the Create Table window. Since you have already selected the range, just click the Ok button.
image

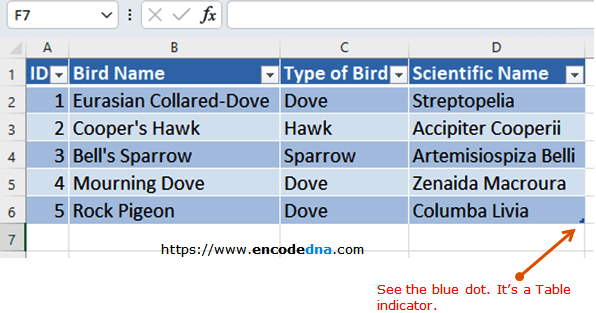
You will see that it has converted the selected data into a table. It will add a default table style. However, you can style the table using other themes.
image

It also automatically opens the Table Design tab. Now you can format the table as per your requirement.
image

2nd Method
Select the data range using the mouse or just hold the Shift key and use the arrow keys to select the data.
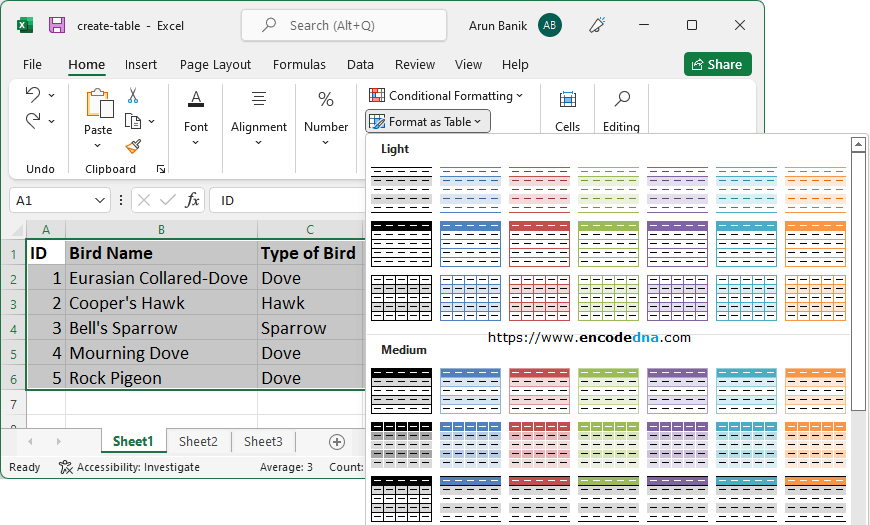
From the top menu, select Home and choose Format as Table option.
Choose a table style from the available options. You can choose from light, medium or dark theme.
image

Similarly, you can add a blank table using the above methods. Simply select a range of cells using the mouse or hold the Shift key and use the arrow keys. Press Ctrl+t to open the Create Table window and press Ok.
Macro to Convert Worksheet data into Table
The data range remains the same for this example. See the 1st image above. However, I’ll add button (an ActiveX control) on my worksheet. So, when you click the button, it will convert the data into a table.
Option Explicit

Private Sub CommandButton1_Click()
On Error GoTo err_handle

    ' Add a ListObject to create and add a table.
    Dim objList As ListObject
    Set objList = ListObjects.Add(xlSrcRange, Selection, , xlYes)
    ' OR you can use...
    ' Set objList = ActiveSheet.ListObjects.Add(xlSrcRange, Selection, , xlYes)

    ' Add name and style to the table using these two ListObject properties.
    objList.Name = "birds_table"
    objList.TableStyle = "TableStyleLight10"
err_handle
    '
End Sub
Here I am using the ListObject object to create a table around the data. We can create and delete tables using this object.
The ListObject object is a member of the ListObjects collection.
The ListObject object provides many useful properties and methods, and I am using two properties in the code. These are .Name and .TableStyle.
But first, we need to initialize ListObject
Set objList = ListObjects.Add(xlSrcRange, Selection, , xlYes)
The .Add() method takes six parameters, however I have provided only 3. That’s what I need to create a table.
• The first argument is the SourceType and the value is xlSrcRange.
• The second is Source and the value here is Selection. So when you select a particular range of data on your worksheet, it will convert that piece of data into a table.
• I have ignored the third argument.
• The fourth argument is xlYes. This indicates whether the data range has header or not. The data has header. Change the value to xlNo and see what happens.
Finally, I am assigning a Name to the table (or the ListObject) and applying table style to the object.
objList.Name = "birds_table"
objList.TableStyle = "TableStyleLight10"
You can choose any table style like TableStyleLight1 etc.
For more table style, select Home and choose Format as Table option. You will see different themes like Light, Medium and Dark.
Now, select a range of data using the mouse (or by holding the Shift key and use the arrow keys) and click the button to convert the data into a table.
There a one difference here, which I would like to add here. If you are using a macro to convert data into table, you can undo it. However, with the Excel’s built-in process, you can undo the changes.
Macros have its advantages. You can automate the entire process by adding dynamic data to the table, or email the table as HTML Table in body etc.
