It doesn’t matter what programming language you use to write your applications. This article is for both C# and Visual Basic programmers. Since you are not going to write any procedure or function for your CRUD operations. Simply follow the steps carefully.
“The Microsoft ADO.Net Entity Framework or EF is an object-relational mapping framework that enables “.Net developers” to work with relational data using domain-specific objects”. It means developers like you and me, are spared from writing data access code, to some extent.
Create a Table in SQL Server
Since we are using the Entity Framework model for our CRUD operation, we need a database. Using the EF model, you can actually perform direct actions on a database table. Therefore, first create a table in SQL Server.
You can also check our Dummy Database Tables for SQL Server page to create more tables in SQL Server.
CREATE TABLE [dbo].[Books](
    [BookID] [int] IDENTITY(1,1) NOT NULL,
    [BookName] [varchar](50) NULL,
    [Category] [varchar](50) NULL,
    [Price] [numeric](18, 2) NULL,
    [Price_Range] [varchar](20) NULL,
    PRIMARY KEY CLUSTERED ( [BookID] ASC )
) ON [PRIMARY]
Now add few rows of data to the table.
INSERT INTO dbo.Books
    (BookName, Category, Price, Price_Range)
VALUES
    ('Computer Architecture', 'Computers', 125.6, '100-150'),
    ('Advanced Composite Materials', 'Science', 172.56, '150-200'),
    ('Asp.Net 4 Blue Book', 'Programming', 56.00, '50-100'),
    ('Strategies Unplugged', 'Science', 99.99, '50-100'),
    ('Teaching Science', 'Science', 164.10, '150-200'),
    ('Challenging Times', 'Business', 150.70, '150-200'),
    ('Circuit Bending', 'Science', 112.00, '100-150'),
    ('Popular Science', 'Science', 210.40, '200-250'),
    ('ADOBE Premiere', 'Computers', 62.20, '50-100')
Create the MVC Project
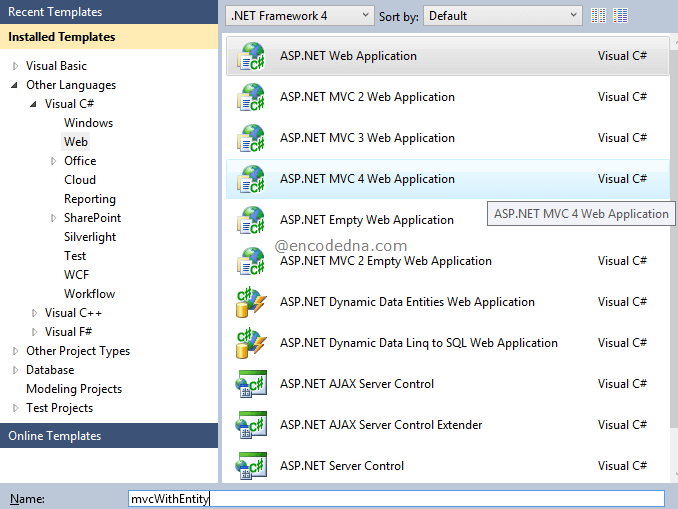
1) Open Visual Studio and from the top menu choose File -> New Project. In the New Project window, select Asp.Net MVC 4 for Web Application. Use any other version. Choose the language. Give your project a Name. Click the OK button.
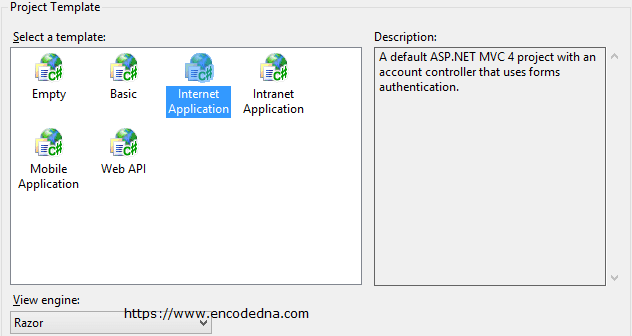
2) This will open a New Asp.Net MVC project window. Choose the Internet Application template. Click the OK button.
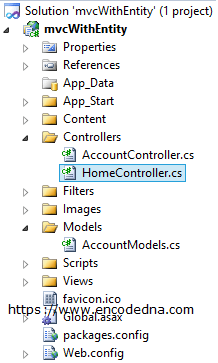
Visual Studio will create your MVC project with default files and folders. It will also create the Home Controller inside the Controller folder.
Now let’s create the Entity Framework
The ADO.Net Entity Framework
By default, the ADO.Net Entity Framework is installed when you have installed Visual Studio in your computer. Follow these steps to add Entity framework to your project.
• Open the Solution Explorer window. Right click the Project, choose Add and select New Item. Alternatively, simple use this key combination Ctrl+Shift+A, to open Add New Item window.
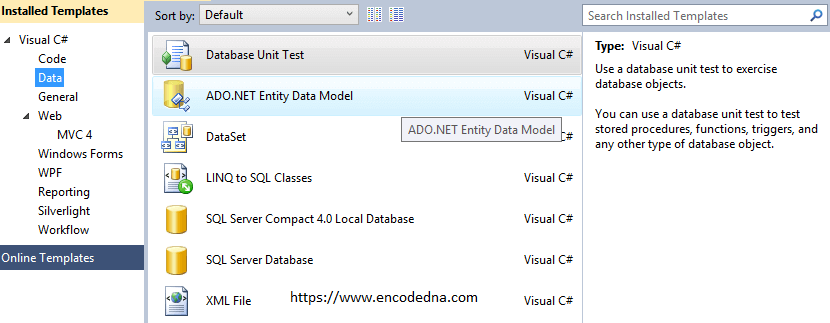
• In the Add New Item window, select the Data template and choose ADO.Net Entity Data Model. Give the Entity framework a name like, Books.edmx. See the image.
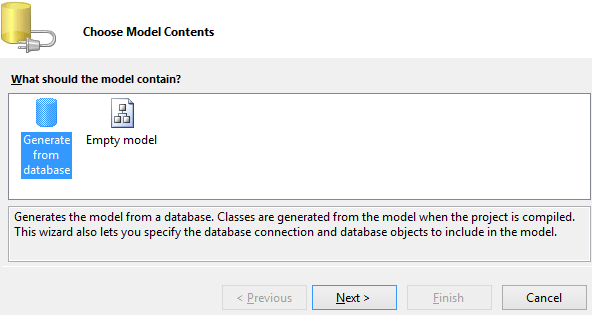
• Clicking the Add button will open the Entity Data Model Wizard window. Follow the steps. You will have to choose contents for your Model. Choose Generate from database option and Next button.
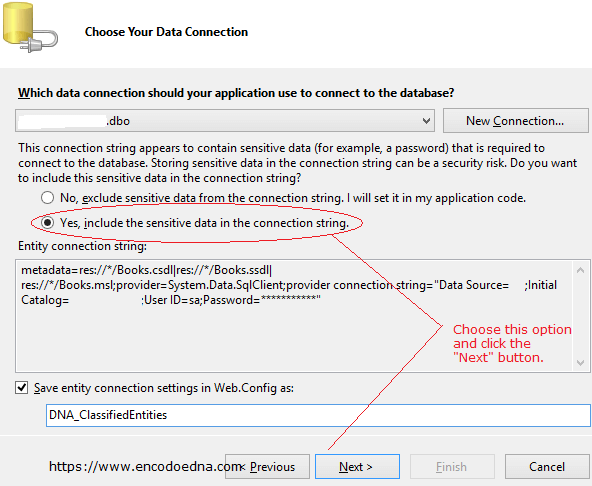
• Next, create a new connection and add the database (in which you have created the Books table).
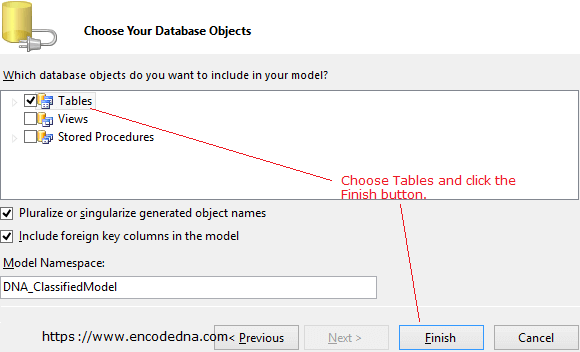
• Choose the Database object like the Tables. You can also choose Views or Stored Procedures, if you have created any.
Note: You can expand the Tables option and choose the table (for example Books) and ignore other tables.
Let us now create our Controller.
The Books Controller
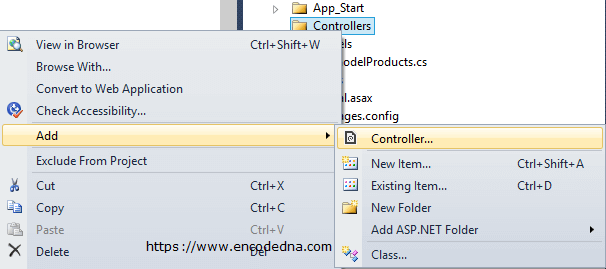
1) Right click the Controllers folder from the Solution Explorer window.
2) Roll the mouse over the Add option and select the Controller option.
3) Name the Controller as booksController.cs (or .vb for Visual Basic). Choose these options under Scaffolding options. See the image.
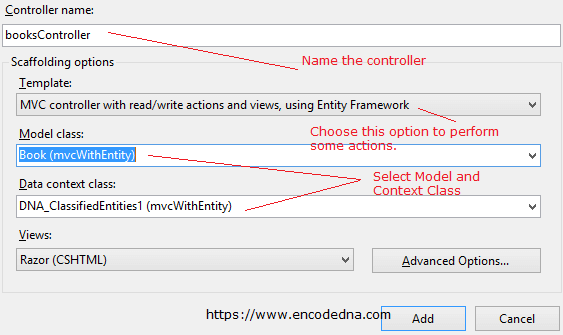
Remember: You won’t face in difficulty in finding the choosing the Model and Data context class if you have few objects (like table etc) to choose from. Therefore, choose and name your Model properties carefully, to avoid any confusion.
4) If everything goes right, it will successfully create the Controller along with the Views. Look at the below image, especially inside the Views folder. It has created a books folder under Views with some .cshtml files (or .vbhtml files for Visual basic).
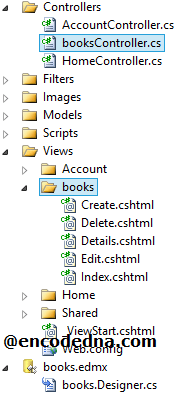
Your application is ready to perform some basic CRUD operation actions, like Create, Edit, Delete and Details etc. Open the “booksController” file to see all the ActionResult functions.
However, there is one important thing left to do, before you run the application. When you have created this MVC project, it added a default controller named Home. It has also mapped this controller. Therefore, if you now run the application, you will see the Home page with some default actions.
You have to map the booksController to set it as default or start page. You will have to do it manually.
Open RouteConfig.cs file (RouteConfig.vb for Visual Basic) under the App_Start folder. Change the controller Home to books. Here’s the code.
Default ...
defaults: new { controller = "Home", action = "Index", id = UrlParameter.Optional }Change to ...
defaults: new { controller = "books", action = "Index", id = UrlParameter.Optional }Now, run the application. You will see the data from books table in tabular format on the browser.
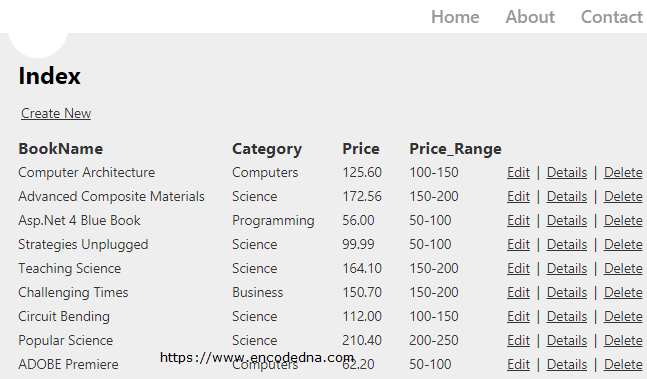
Simple isn’t it. You can create and add new records in the table, edit or delete the existing records. It also provides an option to view the data.
It looks like a simple set form for performing basic CRUD operations. Expect few changes and a simple walk through the wizard, you have a created this application, without actually writing any code. Well, we only created the database.
